Wednesday, January 11, 2023
Protective Styles For Natural Hair Short Protective styles are essential for those with short natural hair. With the right techniques and a few tips, you can turn your short natural hair into a spectacular work of art. These styles help to protect and maintain the health of your hair while preserving its natural beauty. With that being said, we've gathered 4 amazing protective styles for you to try out. /promo-2-b2ac583f6a5e49679d55576bfb1c80fe.jpg)

Style 1: Simple Twist-Out
Step 1: Clean your hair
First, start off with a clean head of hair. Use your trusted shampoo and conditioner to eliminate dirt and buildup. Be careful not to strip your hair of its natural oils.Step 2: Moisturize your hair
After cleansing, it's essential to moisturize your hair to prevent breakage. Apply a leave-in conditioner to your hair, paying close attention to the ends, where your hair is most vulnerable.Step 3: Twist your hair
Start to twist your hair in small sections and ensure that it's not too tight or too loose. Once you've completed your twists, allow them to air dry or use a dryer with a diffuser attachment. Step 4: Take down your twists
After your twists have dried completely, it's now time to take them down. Start by applying a natural oil to your fingers to help prevent frizz as you unravel each twist.Step 5: Style your hair
Take a wide-tooth comb or your fingers to separate and fluff out each twist. Be gentle when separating the twists to prevent unnecessary shedding. Repeat these steps as often as needed to maintain your twist-out style.Style 2: Braided Crown
Step 1: Section your hair
Start by parting your hair from ear to ear and create two sections. Secure each section with a hair tie to keep them out of the way while you braid.Step 2: Create your braids
Start braiding your hair in each section, beginning at the top of your head and working your way down. Use a rubber band at the end of each braid to keep it in place. Step 3: Secure your braids
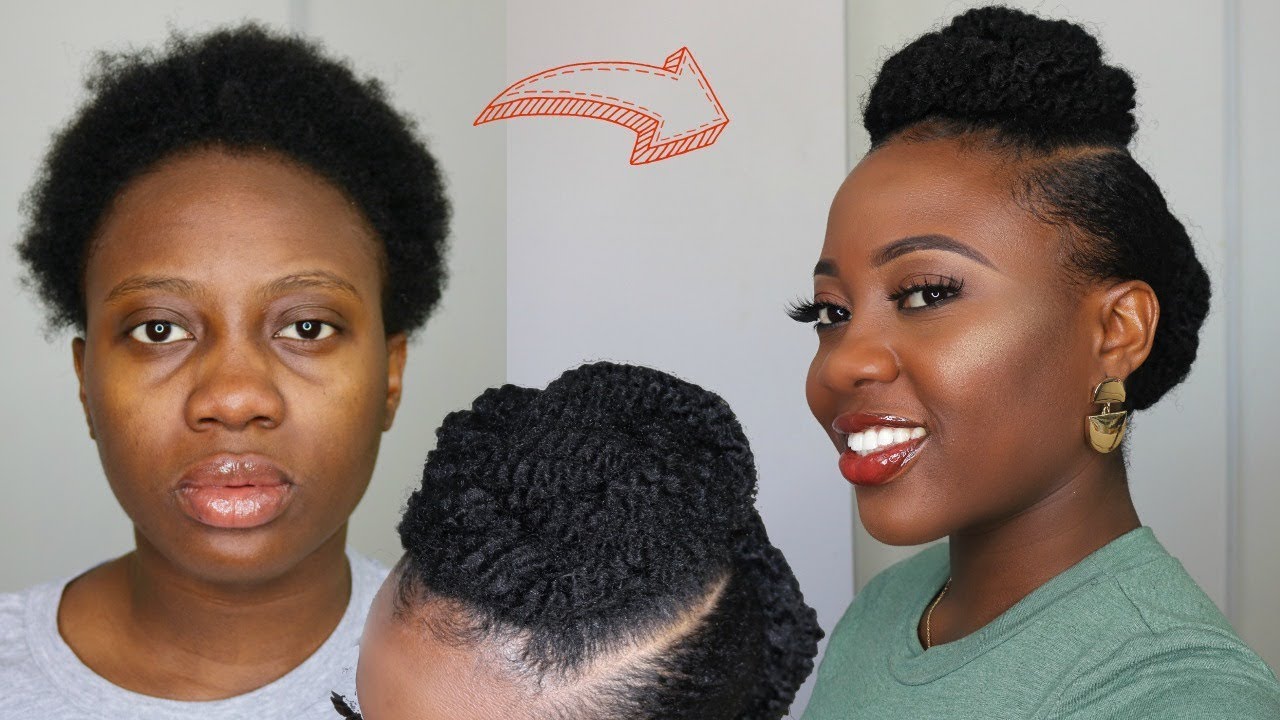
Carefully wrap each braid around your head until you create the crown. Use bobby pins to hold the braids in place securely. Add your own flair by leaving some hair out or by adding hair accessories.Style 3: Protective Updo
Step 1: Prep your hair
Start off by moisturizing and detangling your hair. Twist or braid your hair to stretch it out and create a voluminous look.Step 2: Create a bun or puff
Gather your hair into a bun or puff, securing with bobby pins or a hair tie. To create a puff, use a headband to gather your hair at the front and to create a half-up, half-down style. Step 3: Add accessories
Once you've created your bun or puff, you can add accessories such as hairpins or combs to make it more stylish.Style 4: Twisted Rope Braid
Step 1: Detangle your hair
Before creating your twisted rope braid, it's important to detangle your hair properly. You can use your fingers, a wide-tooth comb, or a detangling brush to remove any knots or tangles.Step 2: Part your hair
Part your hair into two sections, right down the middle of your head.Step 3: Twist your hair
Starting from the nape of your neck, twist each section of your hair until you reach the ends. Use a rubber band or hair tie to secure the ends. Step 4: Twirl your hair sections
Twirl each twisted segment of hair around itself to form a twisted rope. Repeat until you've twisted both sides of your hair.Step 5: Secure your hair
Carefully intertwine both twisted ropes to create a complete braid. Use a rubber band or hair tie to secure the bottom section of the braid. Each of these protective styles can be modified and personalized to fit your style and preferences. With these simple tips and techniques, you can maintain the health and beauty of your short natural hair. Try these styles out for yourself and see which one works best for you.Read more articles about Protective Styles For Natural Hair Short